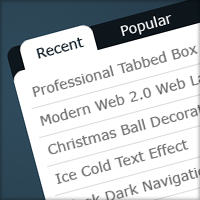
Professional Tabbed Box
Tabbed boxes in sidebars on blogs seem to be popping up everywhere so in this tutorial I’ll be teaching you how to design a professional looking tabbed box.
Step 1
First off, create a new document – for the purpose of this tutorial I’ve chosen a size of 600 by 420 pixels but you could be adding this to your web design. Fill the background with a radial gradient using the two colours #2f4a5b and #15212a.

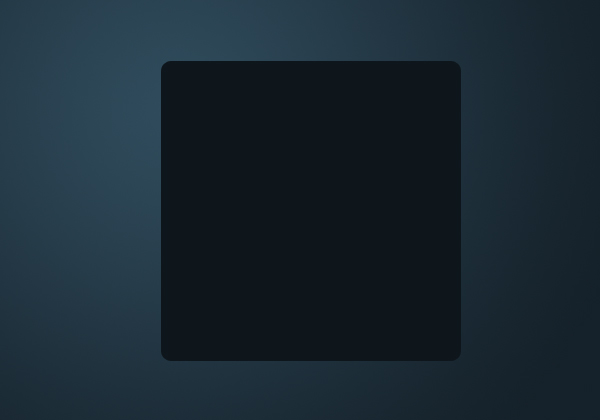
Step 2
Create a new layer and select the rounded rectangle tool set with a radius of 10 pixels and ‘shape layers’ (default). Make a shape in the middle 300 pixels wide and 300 pixels high with a colour of #0e161c. To make a fixed size shape click the down arrow on the left of ‘radius’ at the top and go to ‘fixed size’ and enter the values.
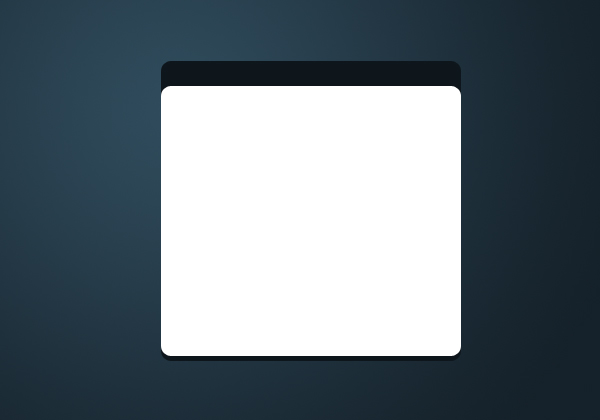
Step 3
On a new layer make another shape, but this time the colour is white and the height is 270 pixels. Make it 5 pixels higher than the bottom of the first shape.
Step 4
Now using the text tool add in some text links. The font I’ve used here is Verdana size 14 pt and colour #747474. Make sure that you have the line height set at 30 pt so the next step is easier.
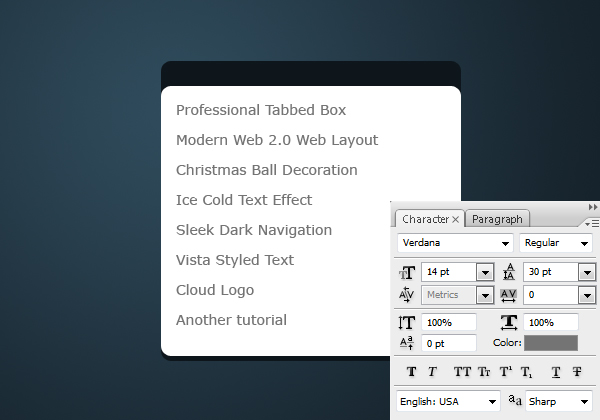
Step 5
On a new layer make a selection 280 pixels wide and one pixel high between the first two links. Fill the selection with the colour #dedede. To fill a selection simply go Edit > Fill with colour.
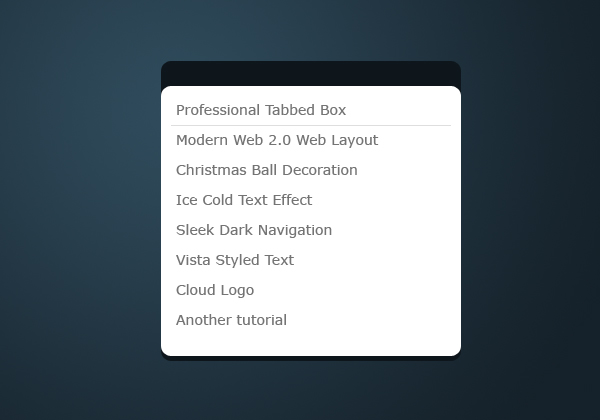
Duplicate this layer and move it down 30 pixels (Ctrl + Shift + Down x 3). Repeat this until you have an underline for each link. If you did not have a line height of 30 pt then you would of had to move the line down one pixel at a time until it was half way between the two links.

Step 6
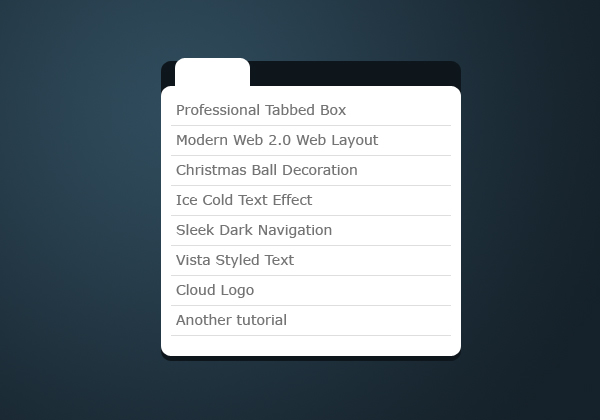
Create a new layer and using the rounded rectangle tool again (this time set it to unconstrained not fixed size) make a shape similiar to the one below with a colour of white.
Step 7
Lastly, add in some text for the tab parts. The font is Verdana, and the colour I’ve used for the active tab is #15212a and for the others the colour is white. If you’d like to learn how to code this design using html and jQuery follow the code side of this tutorial.


sure, its very nice to see the article.
i am a beginner in photoshop tech.
sure its helps me a lot to understand .
keep going
good work
somanathan
I would never design a nav like this with PS, use some CSS & JS. Based on this there isn’t enough detail for anyone trying to learn to actually put this into action.
This is just the design process – to get the colours right and spacings. Going straight to CSS can be more difficult without a design to go from.
Before I actually create the websites I’m designing I always first create a concept. This tutorial is especially helpful for these kinds of situations!
I like the color combination in the background, and the simplicity of the tabbed box.
Andy, don’t be a db.
This actually helps way more than most tuts. It’s some of the simple stuff like this that I am missing. Doesn’t matter if it’s functional or not.
Between the 30pt note and the gradient background colors and the rounded corners I learned a lot from this “simple tut”. *Stumbled
Thanks for your comments.
I’m glad that it helped you out with some of the things that other people tend to leave out in their tutorials :)
Great tut! Thanks for the skills.
is there any help to put these static graphics into action ??? using CSS or js ??
can anyone reply at
I’m in the process of sorting out a ‘premium’ section of the site which will provide tutorials on how to do the coding side of it and will also provide downloads of the .psd samples.
DavidThanks for the tutorial; the code works great and I am using it on my wetbise for tabbed panels now. I really needed this capability so really glad to see you put this out there.I had one problem at first, that I solved quickly, and others may have it too so here it is. In your tutorial step 2, the code as displayed there assumes the target page is in the root directory. If however you store your target page in a subfolder of the root, I think you need to modify that step 2 code to look like this: The diff is the ../ in front of the SpryAssets folder. I think that converts the path from a doc-relative one to a root-relative one (so should work no matter where on the site you hide the target page).But let me know if that causes any other problems!Thanks again for the excellent tutorial. M
It is very good pictures…
Nice work…
it is easy to learn…
next times more pictures likes this
can help me to learn it..
thanks..
well, its easy to create this, but how to make it work with JS and CSS?
That’s the most important thing!
At the end of the tutorial there’s a link to the code tutorial which teaches you how to work with the JS and CSS.
it’s helpful…
Respect…
#235G735A
Excellent design