
Page Fold Effect
It seems to be increasingly common to find page folds in icons and sites on the web so in this tutorial I’m going to be teaching you how to make one yourself.
Step 1
Create a new document (mine is 600 by 420 pixels) and fill with a dark gradient or solid colour. I’ve filled mine with a radial gradient from #242424 to #0e0e0e.

Step 2
On a new layer select the rounded rectangle tool and make a rectangle 250 pixels wide and 300 pixels high with a colour of white and a radius of 5 pixels. This is our page ;)

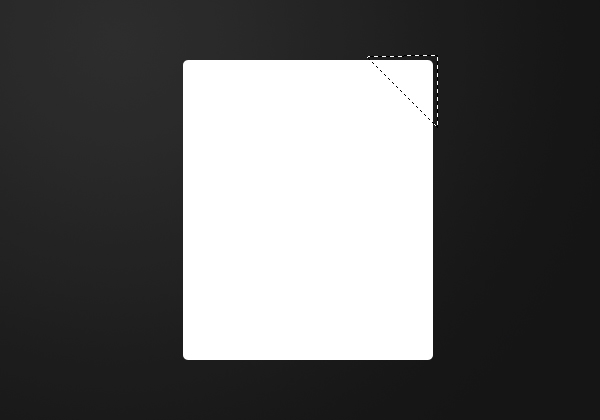
Step 3
Using the polygonal lasso tool make this selection. Hold down the shift key to make it line up at a 45 degree angle.
Step 4
Rasterize the layer (right click > rasterize layer) and remove selection (hit delete).

Step 5
On a new layer use the rounded rectangle tool to make a 100 by 100 pixel white box.

Step 6
This is our fold part, and we want to get rid of the part outside of the page so firstly rasterize the layer like we did before. Now select the area of the page (Ctrl + click the layer’s thumbnail) and invert selection (Select > Inverse) and hit delete.

Step 7
Duplicate this fold layer and fill with a linear gradient from the top right to the bottom left using the colours #c8c8c8 and #eeeeee. This is the fold shadow layer.

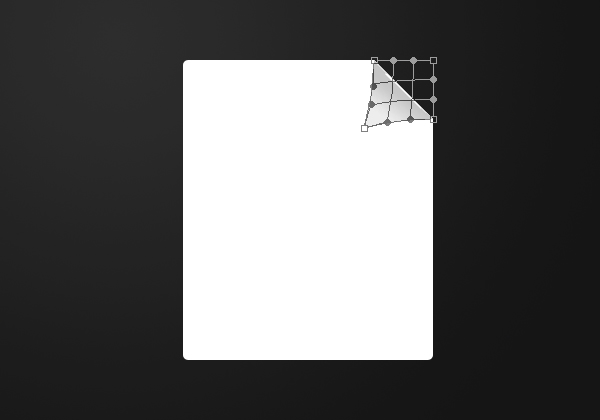
Step 8
Go Edit > Transform > Warp and stretch out the bottom left corner. Hit enter to set the transformation.
Step 9
Move the shadow layer below the fold layer (in the layers window by dragging).

Step 10
And there you have it, your page fold effect! You may also want to warp the fold layer to the left at the bottom too.


love the tutorials man! Great site :) I’ve got this place bookmarked
Great site!!!great tutorial thanks!!!:)
wow really lovely and awsome effect i use for that filter b4 but ur way really great thanks mate i apply it :)
Thanks for the comments :)
Excellent job! wonder if you could avoid steps 3&4
Thanks, I’m not quite sure how you’d go about skipping those steps though.
im giving it now a try, man your tutorials are easy to learn, make some more! thanks and God bless!
trying to combined the other tutorials makes good and excellent result!
Thanks dante, have you checked out all of the older tutorials? I’m away over Christmas & New Year so there won’t be any new tutorials until early January – but I have big plans for next year :)
Can it be done like this?
Skip steps 3, 4, and 6 – Proceed with other steps and after the 9th step select the unwanted area outside the page (as in step3) and fill with background color.
Looking forward to your tutorials in the New year -Seasons greetings !
I’m not exactly sure what you mean Raju but we need to have the fold layer to fill with a gradient to form the shadow otherwise it’s just white on white and you won’t be able to see it. If it comes out the same then it must work, but I don’t suggest skipping steps :P
good luck with the site man… gunna remove this site from my bookmarks though. just not enough updates sadly.
Thanks joe, yea I’ve been away on holiday and have been updating my computer as well so I have had little time to work on my sites and client work. There’s just me writing all of the tutorials and working the site so yea, hopefully I’ll get more time shortly to write some more tutorials.
Awesome!
I’ll try this now!
:)
Thank you a lot .
What font is that?
The large font is Arial, 30pt, with a colour of #c7c7c7. And the small font is 18pt with the opacity set to %60.
nice one
i like this fold!
why you don’t continue to manage this site! you started well :) keep going!
laranz.joe@gmail.com
I’ve started Uni so there’s little time left in my day to create more content, but I’ll try :)
Ok no problem!
keep going!
GOD bless you!
one question.
what sould i do if i want a make this tut. like a book with pictures?
You can use the technique used in this tutorial, and then leave some pages in the corner you’ve cut from to give an effect of a half opened book.
Nice tutorial thanks
Hi, sorry but I’ve problems at step 7: after copy the level with the fold, the gradient tool (the colors are not present but only the “#”) apply to all the document leave the canvas all of one color. Where’s my error? Thanks in advance
Hi Freddie, sorry about leaving the hex numbers out – I’ve added them into the tutorial now.
We want to fill in the bottom left half of the rectangle that is left – so you need to have that selected. Either invert the selection from the previous step (Ctrl + Shift + I), or if the selection is lost you can alternatively Ctrl + Click the layer’s icon like in the previous steps.
Now using the gradient tool fill this selection with the two shades of grey.
Thanks a lot. Good site and good tutorials
Thanx for the information. Very usefull.